GPS tracker installation guide
See correct and incorrect examples of GPS tracker installation. Learn what can go wrong and get instructions on how to properly install a Geotab device.

There are inherent risks with misuse of electronics and these are generally well known and communicated in product instructions and literature with an aim to prevent accidents. Many user warning labels of products include warnings like: “improper use may lead to serious injury….” along with instructions stating the do’s and don’ts. GPS tracker installation is no different. It is essential to review the installation instructions carefully and read and follow the specific warnings that are found on the specification sheet.
In this post, we list some helpful resources for installation. We also give some examples of product misuse and the consequences of not following the specific Geotab installation instructions.
How to install a GPS tracking device
There are a number of online materials to help you learn how to correctly install a Geotab GO GPS tracking device. Device installation is often straightforward. Harnesses are available for specialty installations, heavy-duty applications, or to keep the diagnostic port exposed if desired (professional installation required). We also have two universal T-Harness kits to simplify the installation process.
For simple installation, there are three basic steps to the process. First, locate the on-board diagnostic port (OBD). Next, connect and secure the device. The LED lights on the device will signal when the connection is made. Finally, go online to confirm the device is communicating. That’s it.
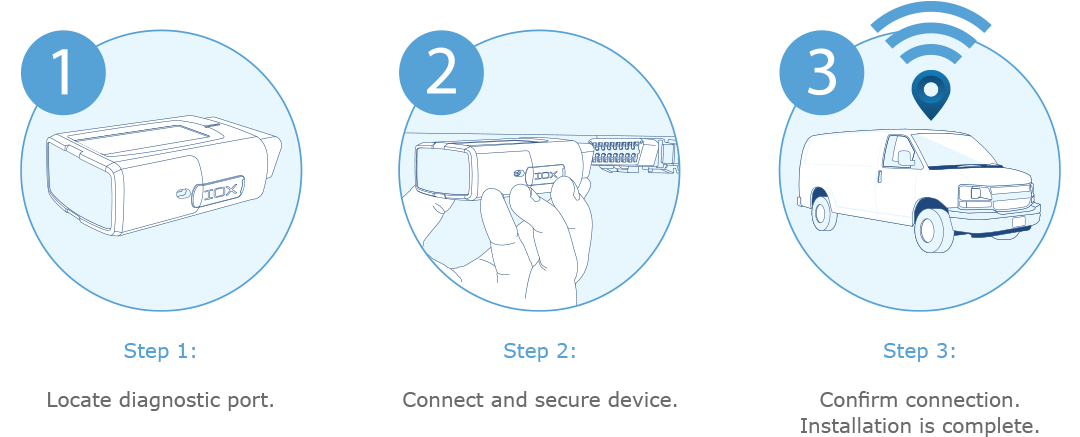
Keep in mind, depending on the type of vehicle or truck or if the port has to be kept free, a specialty harness may be required. Some regulators, like the California Air Resources Board (CARB), enforce provisions that prohibit changes to the OBD unless an exemption has been granted. For more information on telematics harnesses, see the Guide to Geotab Harnesses.
Read important related safety information and limitations of use following these installation instructions. Read and follow all instructions and warnings to prevent serious injury and/or vehicle damage. For more details, see the Telematics Device Installation & Warnings.
Geotab installation resources
Before you get started, please consult the Geotab GO installation guide and video available in the Installation Documentation.
Watch our YouTube video series for easy, step-by-step instructions on installation.
- How to Install Geotab’s Vehicle Tracking Device
- How to Install Geotab’s 9-Pin T-Harness Heavy-Duty Fleet Device
- How to Install Geotab’s 16-Pin T-Harness Fleet Management Device
- How to Install with Geotab’s Universal T-Harness Kits: View here on YouTube
Examples of correct installation of a GPS tracker
A Geotab GO device that is correctly installed (with harness or connected to port) will be mounted solidly and secured.
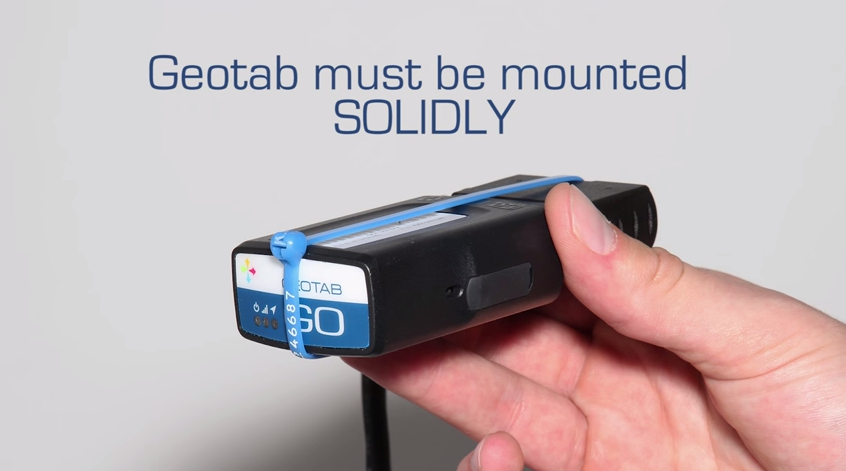
Figure 1. Secure your device with the supplied cable tie.
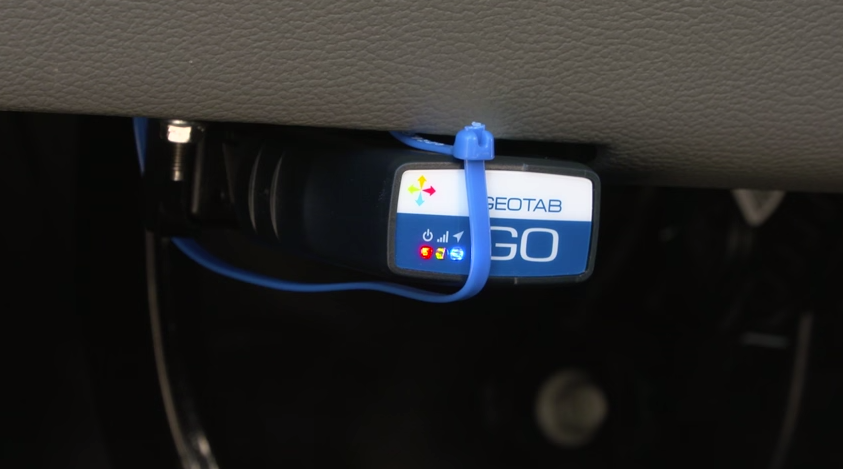
Figure 2. Correct installation directly into port.
Installation Certification Program
If you are interested in becoming a certified Geotab Installer, you can apply here.
How not to install a GPS tracker: 7 examples of improper installation
Scroll down to view a catalog of improper device installations or installations in hazardous environments and the eventual negative consequences that may arise.
1. Crushed or strained device
In the image below, you can see damage to the pins caused by crushing or straining the device.
Common cause: Installations which put torsional stress along the connection between the male and female 16-pin connector.
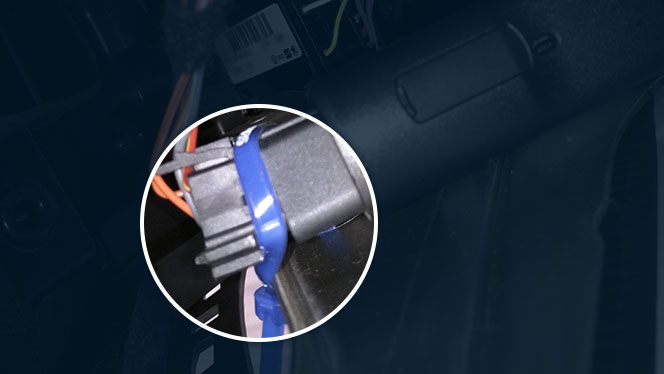
Figure 3. High stress on cables and connectors.
2. Cracked printed circuit board (PCB)
In this example, the printed circuit board (PCB) has cracked from stress.
Common cause:
- Installations which put torsional stress along the connection between the male and female 16-pin connector (See figure 4).
- Severe compressive strain along any side of the device.
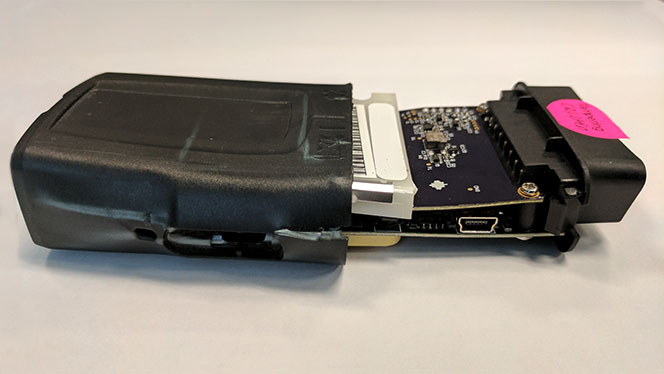
Figure 4. Crushed device and severely damaged PCB.
3. Severed device port
The 16-pin port has been totally severed from the rest of the device.
Common cause: Strong impact or repetitive stress in the torsional direction of 16 pin port.
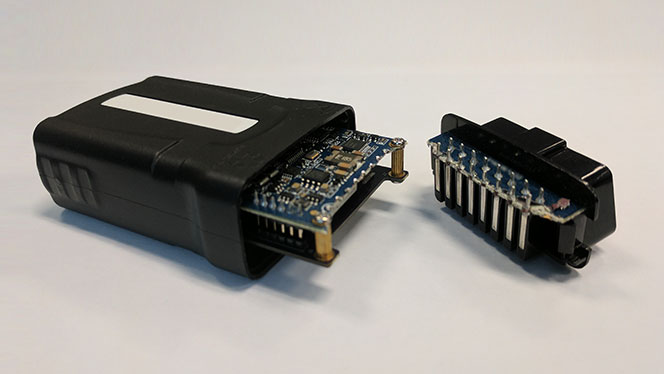
Figure 5. Port completely severed from impact.
4. Loose connections and chafing
The vehicle tracking device here has heat damage.
Common cause: Improperly locating the installation near hardware in vibration or in repetitive movement. Heat may build up from an intermittent connection.
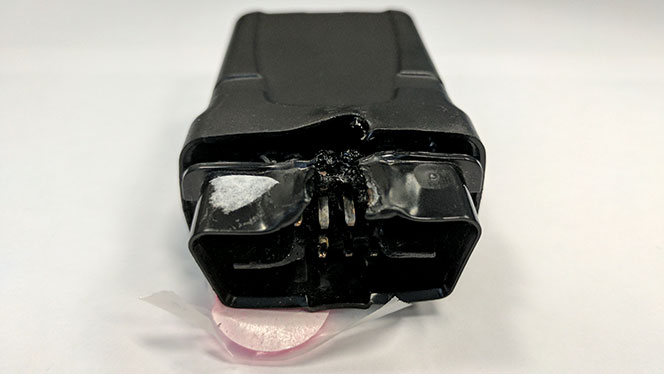
Figure 6. Damaged vehicle connector caused intermittent connection and heat build-up.
5. Moisture and heat
In this example, you can see component level failure causing data corruption.
Common cause: The installation is exposed to liquid in the environment.

Figure 7. Moisture combined with electrically active components.
6. Total device failure
Improper installation led to device failure in the examples shown below.
Common cause: Installation exposed to liquid which can cause short circuits, possible heat build up, melting and in rare cases, fires.
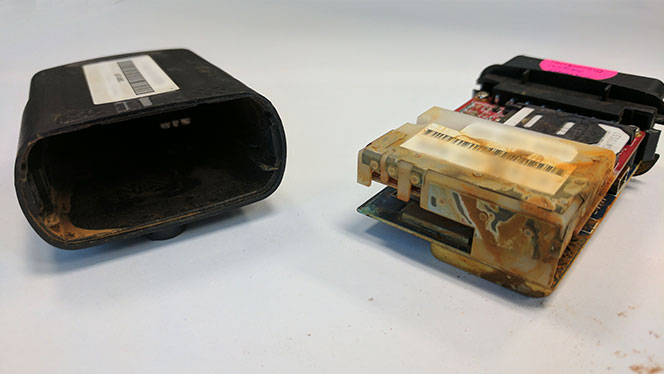
Figure 8. Prolonged liquid exposure causing over all oxidation of device components.
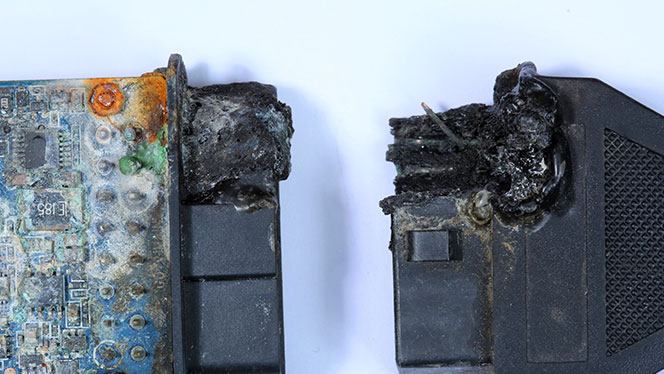
Figure 9. Liquid exposure caused oxidation, which cause a short circuit, which in turn caused heat damage on the device and harness.
7. Heat exposure
This device has been melted from heat exposure.
Common cause: Exposure to external heat sources exceeding temperature range.
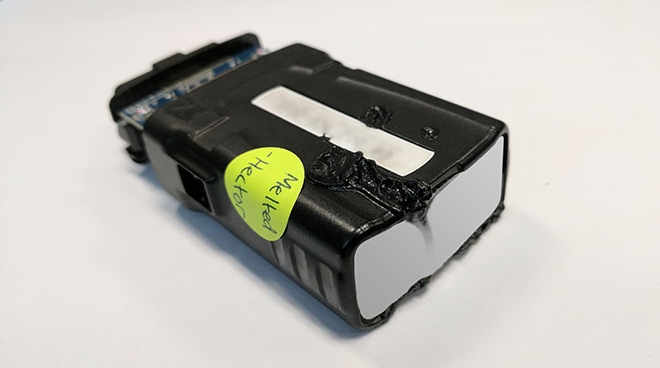
Figure 10. Damage to the case caused by external heat source.
In conclusion, it’s unpredictable how electronics will behave under extreme misuse conditions (outside the operating specifications stated on the product specification sheet), the Geotab GO device included. By following the Geotab product specific installation instructions, and using the product within its design operating envelope as noted on the product specification sheet you not only reduce the risk of device/vehicle damage and injury from misuse, but also improve the device long term reliability.
Next time you get into your Geotab equipped vehicle, take a look at the device installation. Ensure it looks like the good examples provided in figure 9 and figure 10 illustrating correct installation (see section above: Examples of Correct Installation of a GPS Tracker).
If you believe the installation might not be correct, or looks like any of the examples of incorrect installation shown in this blog, notify your fleet manager immediately who should contact their respective Authorized Geotab Reseller for follow-up to ensure the installation is done correctly to keep us on the road ahead.
Related:
Best practices for rolling out large fleets with Geotab GO devices
Subscribe to get industry tips and insights
The Geotab Team write about company news.
Table of Contents
Subscribe to get industry tips and insights
Related posts

What is government fleet management software and how is it used?
April 10, 2025
3 minute read


Geotab: Unlocking value and enhancing K-12 transportation with data-driven fleet management
February 21, 2025
1 minute read

Driver incentive programs to improve safety, retention and fleet efficiency
February 7, 2025
4 minute read
.jpg)
School bus fleet management 101: A comprehensive guide
February 5, 2025
4 minute read
